Soldering the PCB
Have you done the required reading? It’s here
Tools and Parts Needed:
- Soldering Iron
- Soldering Wire
- Tip Cleaner
- Flux
- Tinner
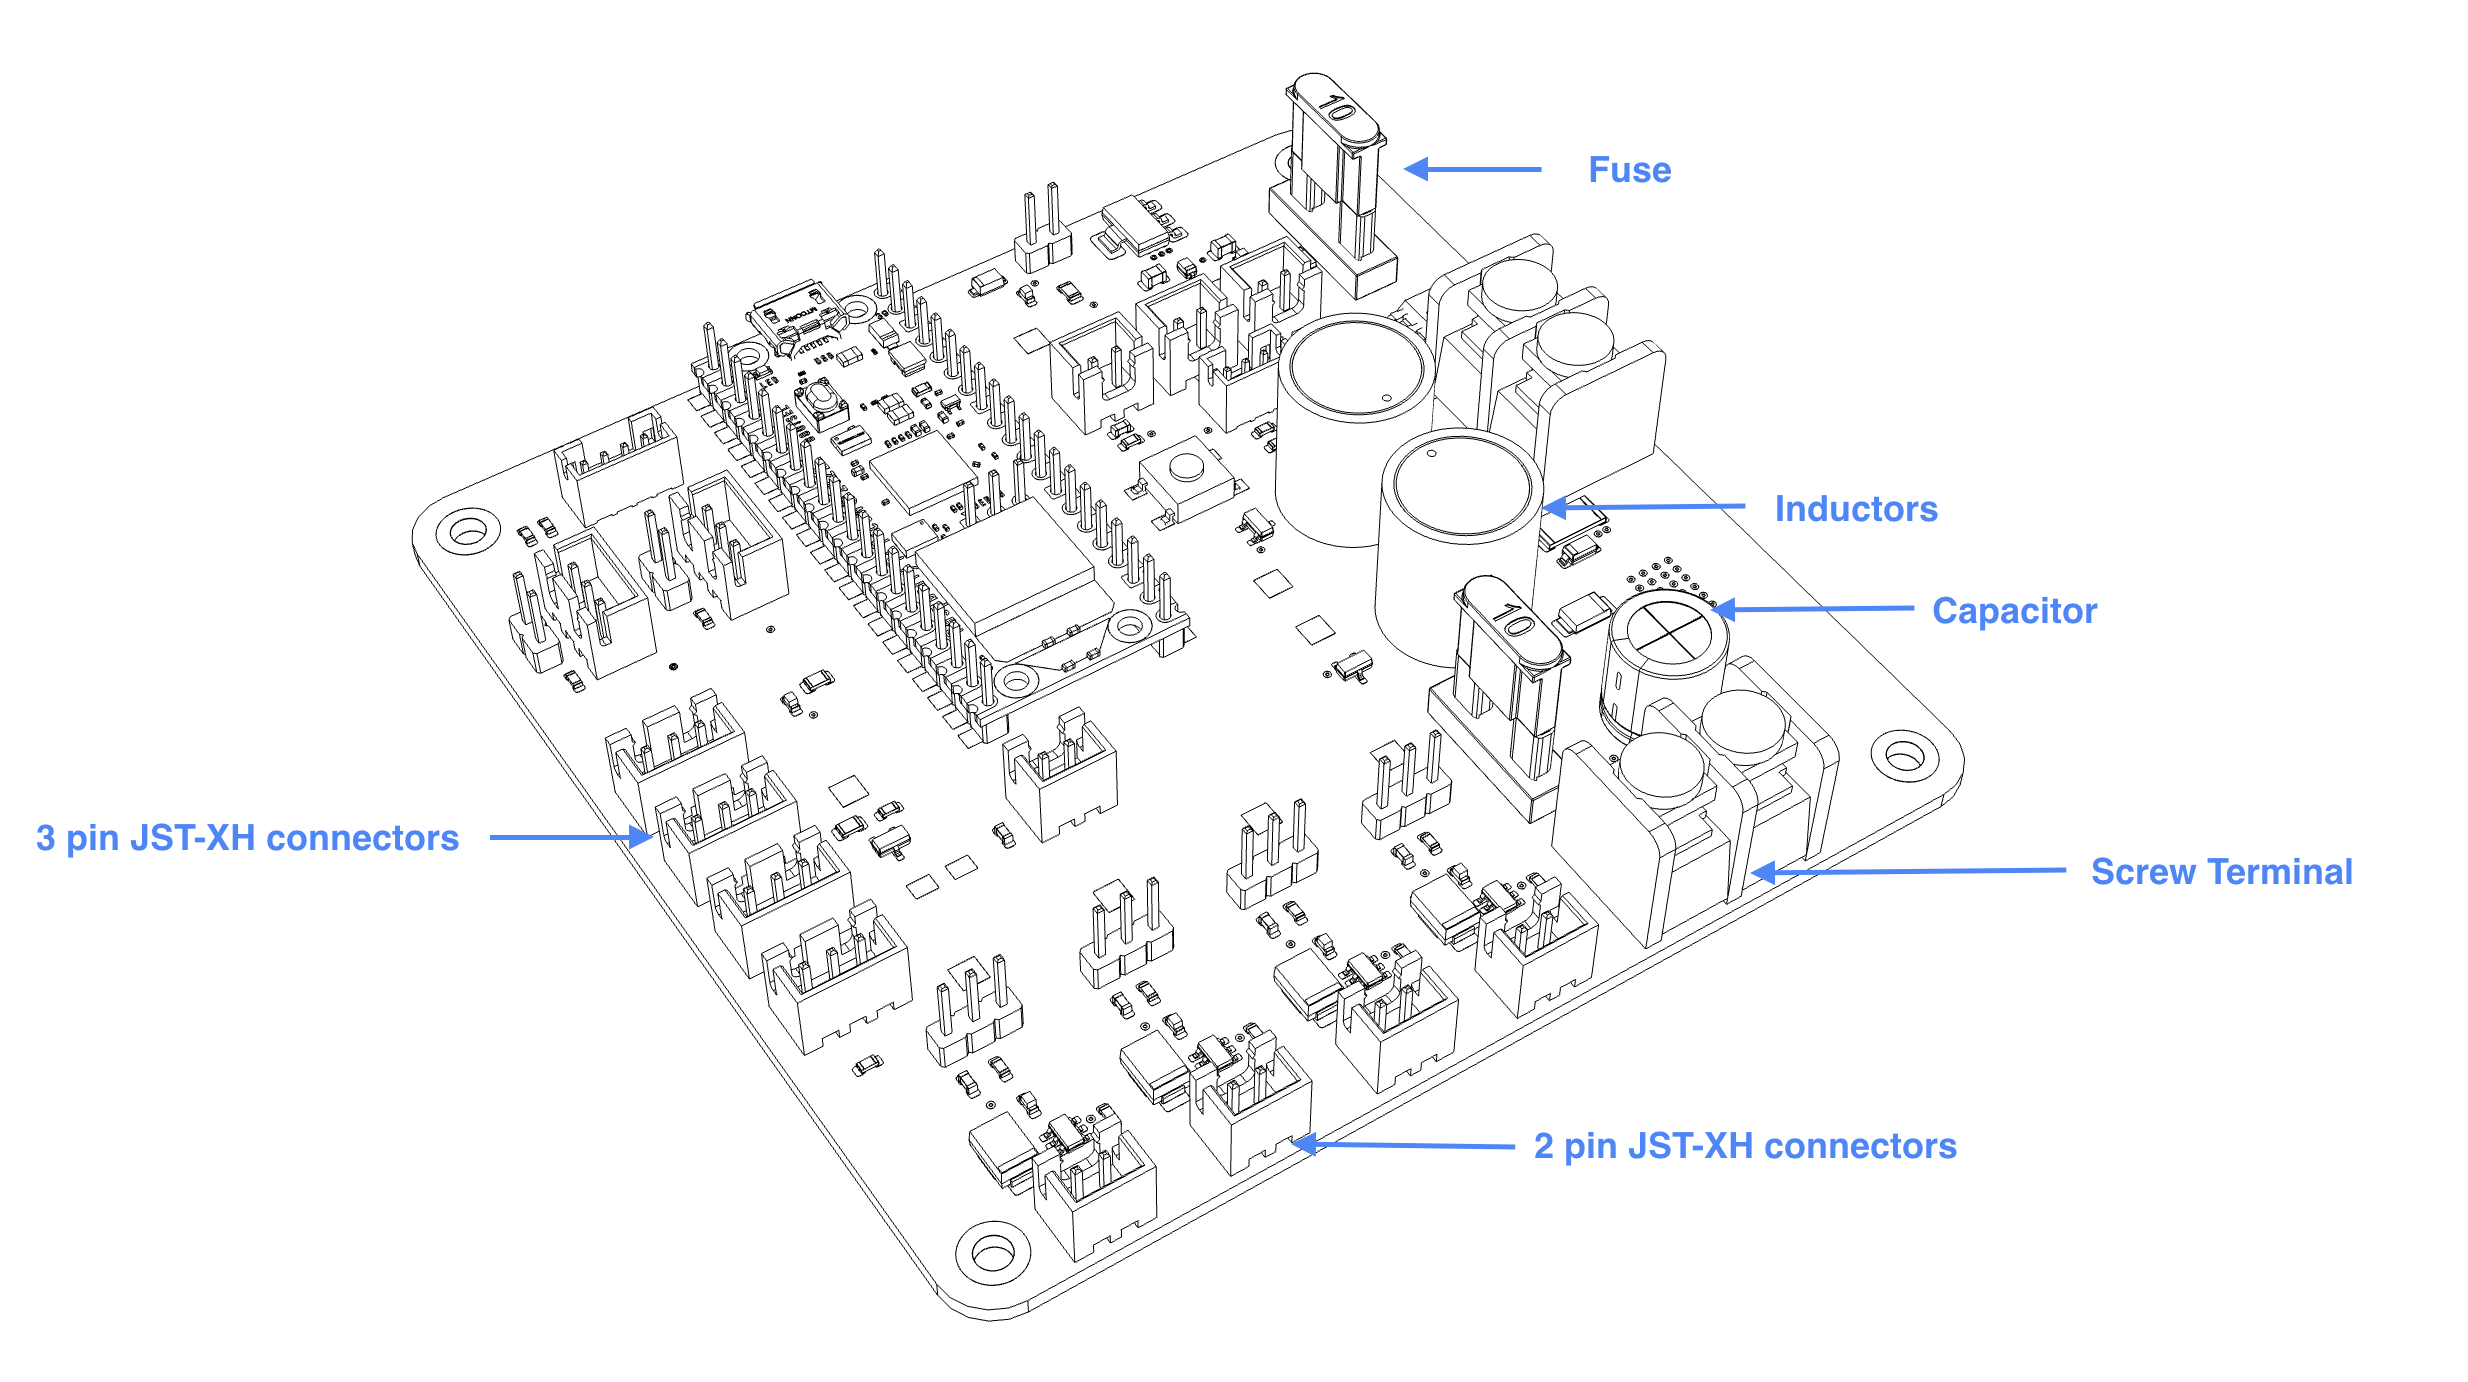
- PCB
- Screw Terminal (black, 2-pin)
- Inductor (grey cylinder, 2-pin)
- JST-XH connectors
- Soldering helper (choose from 3D printed jig, masking tape, or “helping hands”)
Soldering Task Instructions:
- Assemble the tools and components needed for soldering
- Prepare PCB for soldering with soldering setup of choice.
- Affix the screw terminal on the PCB with a “helping hand” or with some masking tape. Be mindful of its orientation.
Note
If you are using the 3D printed soldering jig, you want to start with the shortest component we will be soldering today, the JST-XH connectors.
- Verify the orientation and solder the component to the PCB.
- Now try to solder more components.