3D Printing Cushion Task
The ‘SVG Modifier’ Approach
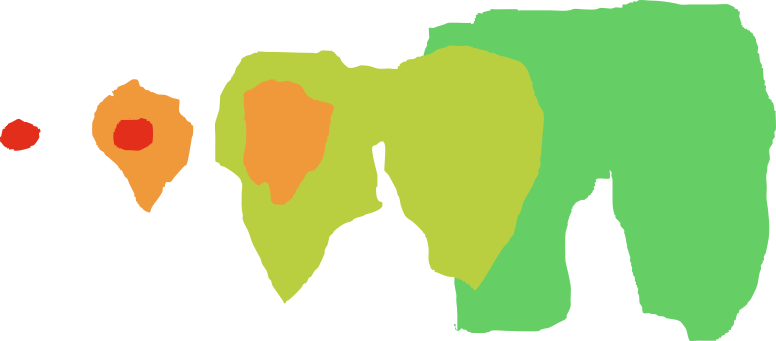
This method takes advantage of a ‘modifier geometry’ feature available in some slicers including Prusaslicer. This allows us to introduce 3D shapes which can interact with the 3D model to modify settings like speed, temperature or line widths. In addition to standard shapes like cubes and cylinders, the modifier geometry feature can also work with SVG files, which we can shape any way we need. If we look at a pressure map like the one below, we can split pressure values into areas and assign different densities to each one. If we can create SVG drawings of each area we can overlay them over our cushion 3D model as modifier geometry and create cushions that go some way toward distributing pressure. This approach is not personalised but is a step forward in improving comfort over standard cushions.

A simplified pressure map example. Usually there are more areas.
An ’exploded’ view of the pressure map ‘area’ stack.
Software Needed (check if they are pre-installed)
- Inkscape
- Prusaslicer (enable the “Ultimaker S line” printers in the configuration assistant)
Instructions
- Choose one of the areas from the pressure map above. Given our time constraints you will work with only one today.
- In Inkscape, select the Bezier tool. This is different to a classic paint tool, this is how it works:
- When you first Left-Click on the canvas you set the first point.
- From the move to where you want your curve to end.
- If you don’t wish to set a curve to your line just Left-Click again to set a straight line.
- To add a curve, Left-Click and hold - moving the mouse around now induces a curve. When you’re done release the left mouse button.
- Repeat until you’re back at the start.
- When you want to end the area, you can click back on that first point (it is the square icon at the start of your line) to create one final connecting line.
Note
The rules on creating a curved line apply to the last one as well. So if you need a curve, Left-Click and hold.
- Once you’re satisfied with your shape, select the path and click on the export tab indicated below.
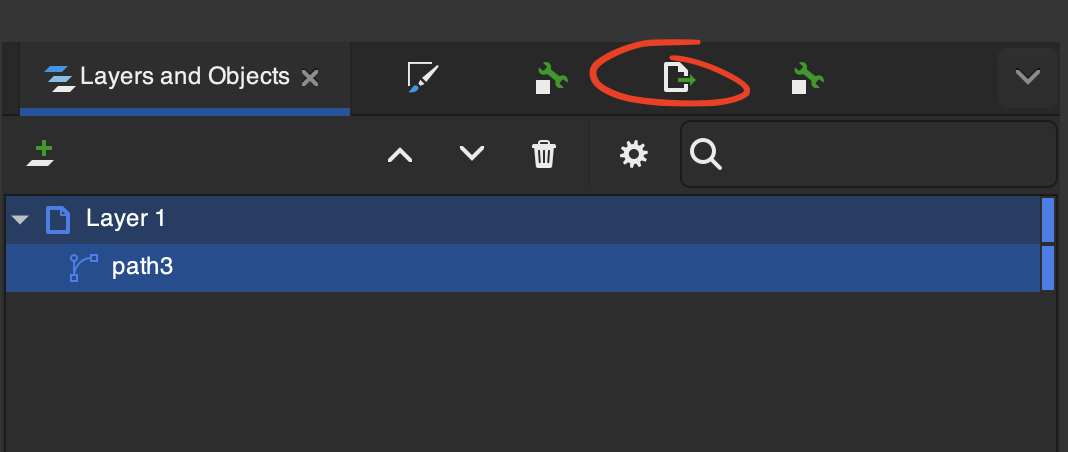
- Make sure the export directory is somewhere you can easily access and select to export the path as an SVG file.
- Now on to slicing, launch Prusaslicer.
- In the printer preset select Ultimaker S5/S7. If no Ultimaker option is selected use the Configuration Assistant to add the preset.
- While the cushions are made with TPU, the S5 printers don’t handle that too well so we’ll be using PLA for this study. Go ahead and select ‘Generic PLA’ for both Filament slots.
- For print settings pick ‘O.25mm DRAFT’, you’ll see the most progress on your print with this! Now go into ‘Print Settings’ > ‘Layers and perimeters’ and for ‘Perimeters’, ‘Top solid layers’ and ‘Bottom solid layers’ to 0.
- In the ‘Infill’ section of ‘Print Settings’, you can swap between ‘Fill patterns’ to see the different lattices. ‘Gyroid’ is particularly good for cushions.
- Now download this cushion model, and import it to Prusaslicer. Resize it to make it fit.
- At this point you can click slice to check you are on the right track. The lattice should be visible from all angles.
- Right-Click on the cushion model and select ‘Add modifier’ > ‘SVG’ and load the SVG file you created in Inkscape.
- Left-Click on the SVG and change its height (Z axis) to match or exceed the height of the cushion.
- Now Right-Click the SVG modifier, select ‘Infill’ and change the infill density to a percentage density different to that of the cushion.
- Finally if you connect a USB drive, Prusaslicer should let you export the GCODE instructions to it. Once that’s done, eject the drive and bring it over to the 3D printer.
- Ensure there are no prints in the printer and that the print head is clean, now navigate to the file in the USB drive and start the print!